Adding Custom AnnotationView with Clickable Buttons Using MKMapView
This Tutorial is about Adding Custom AnnotationView with Clickable Buttons Using MKMapView. I also learned about this from StackOverFlow question. Let's start a new project.
For the Custom AnnotationView with Clickable Buttons, we have to create custom AnnotationView SubClass in the Project. For that let's create a new file.
And add these two methods to the implementation file.
Then Let's go to the ViewController.m file again and modify the viewDidLoad method as this.
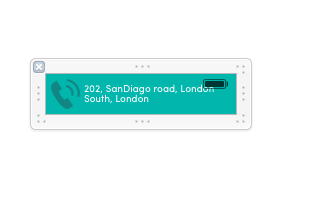
Now we are going to add that custom View to the ViewController.xib. Here is the custom view I'm going to use as AnnotationView with a Call Button.
Now I'm going to add that CustomView property & call Button action method to the project.
Don't forget to import the subclass that we created earlier to the ViewController also.
Now we are going to create this delegate method as below.
Hope you can clear what I did here & Now we are going to run the project.
Here we go.... Here is our beautiful Custom AnnotationView with a clickable Button. You can check Button click by adding just NSLog there.
And add these two methods to the implementation file.
- (UIView*)hitTest:(CGPoint)point withEvent:(UIEvent*)event
{
    UIView* hitView = [super hitTest:point withEvent:event];
    if (hitView != nil)
    {
        [self.superview bringSubviewToFront:self];
    }
    return hitView;
}

- (BOOL)pointInside:(CGPoint)point withEvent:(UIEvent*)event
{
    CGRect rect = self.bounds;
    BOOL isInside = CGRectContainsPoint(rect, point);
    if(!isInside)
    {
        for (UIView *view in self.subviews)
        {
            isInside = CGRectContainsPoint(view.frame, point);
            if(isInside)
                break;
        }
    }
    return isInside;
}
Then Let's go to the ViewController.m file again and modify the viewDidLoad method as this.
- (void)viewDidLoad {
    [super viewDidLoad];

    self.mapKit.delegate = self;

    //Set Default location to zoom
    CLLocationCoordinate2D noLocation = CLLocationCoordinate2DMake(51.900708, -2.083160); //Create the CLLocation from user cordinates
    MKCoordinateRegion viewRegion = MKCoordinateRegionMakeWithDistance(noLocation, 50000, 50000); //Set zooming level
    MKCoordinateRegion adjustedRegion = [self.mapKit regionThatFits:viewRegion]; //add location to map
    [self.mapKit setRegion:adjustedRegion animated:YES]; // create animation zooming

    // Place Annotation Point
    MKPointAnnotation *annotation1 = [[MKPointAnnotation alloc] init]; //Setting Sample location Annotation
    [annotation1 setCoordinate:CLLocationCoordinate2DMake(51.900708, -2.083160)]; //Add cordinates
    [self.mapKit addAnnotation:annotation1];
}
Now we are going to add that custom View to the ViewController.xib. Here is the custom view I'm going to use as AnnotationView with a Call Button.
Now I'm going to add that CustomView property & call Button action method to the project.
Don't forget to import the subclass that we created earlier to the ViewController also.
#import "AnnotationView.h"
Now we are going to create this delegate method as below.
#pragma mark : MKMapKit Delegate

-(MKAnnotationView *)mapView:(MKMapView *)mV viewForAnnotation:(id <MKAnnotation>)annotation
{
    AnnotationView *pinView = nil; //create MKAnnotationView Property

    static NSString *defaultPinID = @"com.invasivecode.pin"; //Get the ID to change the pin
    pinView = (AnnotationView *)[self.mapKit dequeueReusableAnnotationViewWithIdentifier:defaultPinID]; //Setting custom MKAnnotationView to the ID
    if ( pinView == nil )
        pinView = [[AnnotationView alloc]
                   initWithAnnotation:annotation reuseIdentifier:defaultPinID]; // init pinView with ID

    [pinView addSubview:self.customView];
    addSubview:self.customView.center = CGPointMake(self.customView.bounds.size.width*0.1f, -self.customView.bounds.size.height*0.5f);

    pinView.image = [UIImage imageNamed:@"Pin"]; //Set the image to pinView

    return pinView;
}
Hope you can clear what I did here & Now we are going to run the project.
Here we go.... Here is our beautiful Custom AnnotationView with a clickable Button. You can check Button click by adding just NSLog there.


Comments
Post a Comment